Archive | Material Mondays RSS feed for this section

Material Monday: Advanced Wonderflex

15 Aug

So, I had to showcase this. Today’s not so much about what wonderflex is, or how to work with it.

‘Today, is about what you can do with it.

This girl created Wheatley from Portal 2 with wonderflex and I just had to show you!

Wheatley as florists foam

Here, she glued florists foam together then sanded it into a circle. She then drew on the patterns for his outer form

This is where she added layers of wonderflex to build up the shape.

Here she had already cut Wheatley in half and proceeded to cover the insides with wonderflex. This was to make sure that Wheatley would fit back together.

You can see that she’s now covered the inside completely, fitted Wheatley back together and then used latches and some more wonderflex to put the two sides together.

And here’s Wheatley finished. She used Apoxie Scuplt overtop of the Wonderflex to create the hard edges she needed. Check out her full walkthrough on her blog:

htp://furincosplay.blogspot.com

Material Monday: Modge Podge

8 Aug

Modge Podge!

What it is: Modge Podge was designed for decoupaging (which is gluing pictures to something). It is an all-in-one sealer and finish.

What it comes in: Jars. They’re are several varieties of Modge Podge, the varieties are: Paper, Fabric, General (the Original Formula), and Outdoor (Which seals terra cotta, wood, slate and tin). Modge Podge also comes in a variety of finishes including: Gloss, Matte, Satin, Brushstroke, and Shimmer (Metallic).

What it does: Seals craft foam, and creates a paint-able surface for Craft Foam (3-8 coats), Wonderflex (5-8 coats +), and wood.

What it can go over: Acrylic Paint.

Places to Buy:Its sold at most craft stores like AcMoore, Michaels, Jo-Anns, and Hobby Lobby. You can also purchase it directly from the source at Plaid products online.

Pros: Fast Drying, has a variety of uses, extremely handy, water soluble, non-toxic

Cons: Just because it has a variety for fabric, doesn’t mean you should use it for that. Does not work on all projects.

Helpful Hint:  Its best to apply it with a foam brush to keep brush strokes from becoming visible.


Gallery:

Claymore Cosplay, used Modge Podge


Headband with Glitter made with Modge Podge

He attatched these ears using Modge Podge


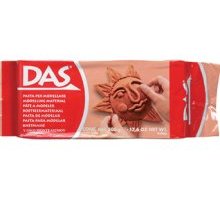
Material Monday: DAS Modeling Clay

25 Jul

Material Monday’s have gotten popular =]

DAS Air Drying Clay

What it is: An Air-Drying, mold-able clay that is non-toxic.

What it comes in: 1 pound and 2 pound packages of rectangular shape. It comes in white and terra-cotta color.

What it does: Allows the user to mold clay pieces without having to fire or glaze the clay.

What it can go over: I tried it out over a wire frame and it seemed relatively wonderful, it has also been used to cover over wood objects (you have to wet the wood first, however). It also does well with being rolled onto a flat sheet.

Places to Buy:Its sold at most craft stores like AcMoore, Michaels, Jo-Anns, and Hobby Lobby.

Pros: Air drying, sandable, texurable

Cons: takes 24 hrs to dry, doesn’t like to be added to itself (attaching two separate pieces of das clas while it is still wet), drys out in air very quickly,

Helpful Hint:  To work with the clay, put the entire contents into a Ziploc bag and keep it in the refrigerator. Only remove what you think you will need and use water to keep the clay moist and flexible.

Gallery (I apologize, I couldn’t find a lot of pictures with the clay)

You can see the clay WAY up in the left hand corner

Made by Bodhi Blastia


All of these were made using Das Clay


If you have a project that you used Das Clay for, let us know and we’ll post it up in the gallery!

Material Monday: Craft Foam

11 Jul

You’ve waited for it and now it’s here! It’s time for Material Monday to cover Craft Foam!!!!

Craft Foam

What it is: Craft Foam, or EVA foam is a thermoplastic with polyester and a bit of vinyl thrown in. It’s resistant to UV radition (didn’t know this before hand) and is crack/stress resistant. Extremely flexible. It is also somewhat water proof. Don’t go sticking it in the water to test this however.

What it comes in: Sheets. You can buy HUGE rolls from companies (l did this to create my GWS Foam Armor) or you can purchase it in smaller sheets 9″ x 12″ at a Craft Store. It comes in several thicknesses from 2mm (available only at craft stores) to 10mm thick. For Cosplaying purposes, use 2-3mm for small details, gauntlets, hair pieces, ect. and 6mm for chest/leg armor. If you are going to be squishing it between two pieces of WonderFlex, I highly suggest not going above 6mm. 6mm create an extremely bulky piece and hard to seal, while 2mm created the same effect without bulkiness.

What it does: Creates a base material for Armor, Headpieces, Weapons, ect.

What can go over it:First, you’ll want a sealing agent. Plasti-Dip (see previous MM posts) is amazing on this stuff and makes it look like leather. Modge Podge is also a good sealer, as well as “Scrim”: a combination of Wood/Sobo glue and water. You can also put craft foam under Styrene sheets or Wonderflex

Places to Buy: Foam Factory is the best place I can find online, but regular craft foam can be purchased at A.C. Moore, Michaels, and JoAnn Fabrics.

Pros: Easy to use, can be heated to a curved shape, lightweight and tough

Cons: Prone to scratches and nail marks without being treated with something, does not have the stiffness of Wonderflex or Styrene

Gallery of Craft Foam Projects:

Eomer's Helmet from the Lord of The Rings


Elven Archer from Helms Deep

This is ALL made from Craft Foam

ff12 Fran by Jaina Solo

Material Monday: Wonderflex

27 Jun

Sheets of Wonderflex

Our second Material Monday is on Wonderflex! I was really excited to start on this post until I actually got down and tried to research. There is a ton of information on Wonderflex from people, so, I’m not going to try and cover it all, but just the basics. Maybe on one MM day we’ll cover advanced Wonderflex. Who knows?

*** I am not affiliated with any of the products or their companies***

Wonderflex:

What it is: A thermoplastic that can be shaped with heat (a hair dryer or paint stripper or even hot water)

What it comes in: Rolled sheets of white plastic with the thread pattern on one side and smooth on the other.

What it does: EVERYTHING! And with this, I mean. People have made helmets, gauntlets, full suits of armor, weapons, this stuff is truly only limited by your experience in working with it and what you want to do.

How you work with it: This will vary little by little depending on whose tutorial you are following. The most basic thing is that you need a heat source to shape it. You wave your heat source (usually a heat gun or paint stripper. Don’t ‘wave’ hot water around) across the surface until you see the Wonderflex become almost transparent. As it heats up, you’ll notice that the WF goes from being a solid white to a translucent white–that is when you can stop heating it and start working with it. Be careful! Wonderflex can get extremely hot (so hot I needed leather gloves to work with it at one point) so you don’t want to shape it bare around your skin.

What can go over it: Spray paint, acrylic, dry wall spackle, bondo…If you want a smooth paint finish, it is in your best interest to use a smoothing agent before you paint.

Places to Buy: Dani’s Cosplay Supplies, and Dazian. For reasons of impartiality, I’m not going to recommend which place to get them from, there are plenty of places with reviews of each.

Downsides to Wonderflex: It gets very hot and has a texture that needs to be gotten rid of before painting. Non flexible. Will also loose shape in high heat (1 hr of direct sunlight at 90 degrees or 115-120 degree temperature)

Upsides to Wonderflex: Super easy to use, extremely durable and can withstand a lot of abuse at cons and in suitcases.

Gallery of Wonderflex Projects:

Wonderflex costume from Kamui

Arm made from Wonderflex

This full suit was created from Wonderflex

This Keyblade was from Wonderflex

Material Monday: Plasti-Dip

20 Jun

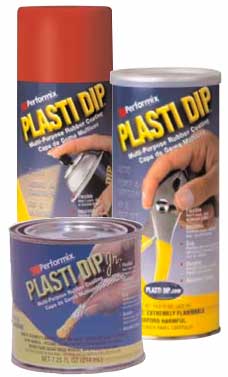
Plasti-Dip Cans

Hello everyone! I’m aiming to set you off on a nice course this week with our first ever feature of Material Monday! Material Monday will happen every week (unless I get swamped with work) and will showcase a new material that you cosplayer’s can work with. I’m hoping to cover Wonderflex, Craft Foam, acrylic paint, Resin, and many other materials. This first week we will cover the product Plasti-Dip.

*** I am not affiliated with any of the products or their companies***

What it is: Plasti-Dip is a multi-purpose rubber coating. It’s flexible and washable and paint-able.

What it comes in: Plasti-Dip has two ways of application. One, is like a spray paint can. The second method is a can, where you need a brush to apply it.

What it does: For foam, creates a primer layer and a sealer layer in one. In cases where you want to create a leather look to the foam, two coats of the spray or one coat of the dip seems to work. The material (when dry) is waterproof, fire resistant and non-conductive.

How you work with it: First, you need to start with a clean surface. PD is NOT going to smooth out any nicks or bumps in your foam. So if you have nicks already this stuff is not going to help it. If you have a surface ready, you simply spray the application a good foot away. I tried spraying it closer and all it does is create a pebbled texture to the foam. If you are painting it, use a foam brush and apply thin coats. It dries in about an hour and is ready to paint on!

Common Uses: People (including me) seem to prefer it on craft foam, EVA foam, Wonderflex, and insulation foam

What can go over it: So far, anything.  Acrylic paint seems to work the best if you want a paint application.

Where you can buy it: Lowes, Home Depot

Down Sides to Plasti-Dip: Wrinkles when bent but seems to go back to normal without any permanent damage. A look at the wrinkling here.

Projects its been used in:

Sub-Zero Costume/Cosplay WIP by Ronster

Plasti-Dip used to create the red body

Gas Mask by Little Lady, painted with Plasti-Dip

Black Plasti Dip on Pants used by Dr. Melbourne

Minotaur Head by KomicKrazy

Armor by Kommissar

Have any pictures of your costume with Plasti Dip? Let me know and I’ll link you!